2012 Christmas Ornaments
Merry Christmas and Happy Holidays!
It’s been a wild year, full of crazy adventures, new jobs and roles, and of course, new ornament designs. The amazing thing is that despite how much things change, and how life may be unpredictable, at least you can count on one thing: a new ornament design each year, and a good one at that! My end-goal is very simple: to elicit as many smiles as possible.
While each year’s events, up-turns, downturns, (all-around-turns?) might change anyone just a little, there’s one thing that I feel just can’t change, with me, anyway…. I don’t wanna grow up! We all remember, to some degree, the things that made us smile, and dance, and laugh, and jump! My theme this year is simple and VERY SERIOUS (okay, I’m totally kidding :p ): be a kid!

When I was young, I absolutely adored Calvin and Hobbes. I had a love for all of the full-color, special comics that Watterson would write and release in the Sunday papers, especially. While Calvin looked little, he always had so much insight and that ultimately-important capability that I strive to utilize: to make big, important concepts seem tiny and fundamental. So fundamental, in fact, that you recognized their place in human nature as just simply… true. And so, on the back of every ornament I made this year, there’s a simple, fundamental request that I ask each [awesome] recipient to do:

Always something different, eh?
You got it! Each year, I try to explore a new method of making ornaments. This can be a different material, a different process, a new dimension, or any combination of those. From the photos I’ve already shown you, you might notice a few key differences for this year, all of which I am quite proud of:
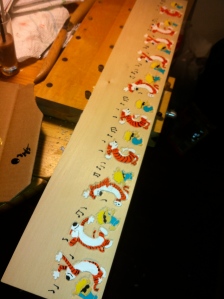
- There are four different Calvin & Hobbes ‘scenes’ from the comic strip that have been translated to ‘ornament-form’.
- There’s a number of designs for the backs of the ornaments (jump, smile, cheer, laugh, dance, play)
- Yup, I carved them (from basswood, of course!)
- Simply, this year’s ornament is my most-ambitious undertaking of yet.
52 hours and counting to make my first batch of ornaments for the 2012 season. Check out how I made them!
I started out by happily searching through all three of my C+H books. I came across the dancing one, and it made me smile…. So clearly, that’s the right one.
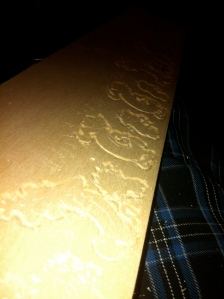
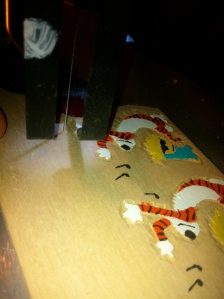
You probably know a little about mass-production, the design process, and invention… This story is similar. Why? My first prototype ornament took me a likely 12 hours to make, not counting the weeks of casual thought I put into it. The first one was done extra-specially, with even the musical notes being intricately carved. Ay carumba! Here’s a few photos of that one:


Then I realized that a few key things from that just couldn’t be done for all 30+ ornaments for this year.. In particular, I knew that I couldn’t spend as much time carving the musical notes, I couldn’t rout the ‘Merry Christmas’ on the back (too much time), and the ‘Calvin and Hobbes’ stencil I made (yup, I made one) simply looked like I’d written it with pen. Okay, fine… On to the big leagues!
1. Taped as many comic printouts onto each piece of basswood as would fit.
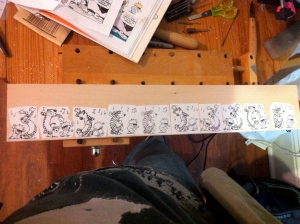
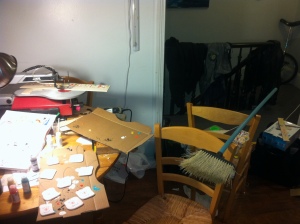
I even used my clamp-onto-kitchen-table vise to help with this project! My kitchen became my workshop, and well… my entire apartment is a mess!
2. Cut through the paper (on the lines) to transfer the image onto wood.
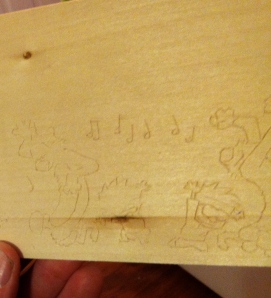
You can just barely see the lines now.
3. Stop-cut the transfer further. This step was quite boring and I desperately wanted to bypass it. All I did here was remove the paper, then I used my carving blade to follow all the lines I’d cut, again. This step allows for less headaches when I went to remove wood from around the characters, because I had to cut further into the wood. No pictures necessary!
4. Cut around the characters!
This step was very rewarding for me. Finally, it looked like I was carving something! Often, I sat on my couch and did this step. Turns out, it really is best to carve wood when it isn’t in a vise, held in a fixed position. In this way, I could rotate my piece and made sure to make each cut at exactly the right angle. And yes, that should exemplify just how messy my apartment is right now. Lots of chips everywhere~
4. Finalize and clean up the wood. This included using my super-sharp (!) eyesight to look over the piece and notice where I hadn’t removed tiny splinters of wood that would detract from the overall appearance. No real photo necessary here either.
5. Paint it!
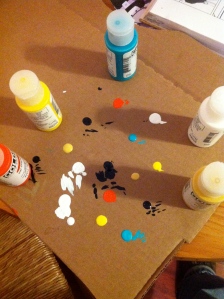
In previous steps, I’d carve and inspect each ornament’s figures at a time. For this step, I did it truly mass-production style, just like your computer printer does it, kindof. I painted each color at a time, for the entire 10-ornament jumble. If you want me to be specific, it went like this: white, orange, blue, yellow, peach, then black.
6. Cut each ornament out.
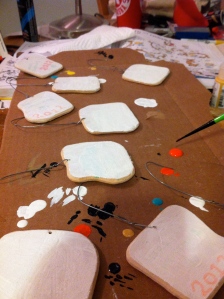
7. Now for the backs. First painted the white background:
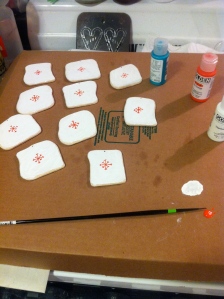
You’ll notice on the ornament at the bottom of this photo that you can see ‘2012’ in faint red. I had a night of misery when my original backs’ paint, done with paint pens, was found to dissolve when I used my spray lacquer on it. Darn! So I used my white acrylic paint to fix this ugly paint problem. Some ornaments still have visible ‘2012’ under the white. A bonus!
8. Finish painting the back designs.
Yup, that’s my super-skinny brush. I can be a painter yet! The best painting surface yet: pizza box!
9. Lacquer ’em!
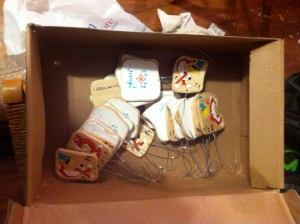
Okay so that’s not a great photo of them being lacquered. But, you see my drying apparatus? Yes, that’s a broom that each ornament ‘hung out’ on while learning to look their best. Before lacquering, I drilled the ornaments and added their characteristic wire hanger. That way, I could hang those babies out to dry!
The End!
AMAZING THANKS go out to my Mom, for helping with encouragement, suggestions, :and: shipping, Nelson, and everyone I asked for opinions throughout the long days and nights I spent working on these.
I hope that you will cherish your ornament, keep me updated with how it looks on your trees in years to come, and most importantly, smile (a ton!). Thank you for being an important part of my realm, and one last thing: keep rocking! Merry Christmas, and have a happy new year!
Your humble fan,
Doug
2011 Christmas/Holidays Ornament!
Happy Holidays!
I hope you all are doing great- I’m doing good, and even better to be able to fill you in on my most recent project. This year’s ornament is a completely new design! I’ve hardly been able to contain my excitement to unveil this year’s design and creation… And am glad that I can finally do so. Warning, this post might be a bit long!

Two things really drove me to make what I decided to make this year.
First, I’ve lately been upset by the notion of just how much stuff we ‘waste’. What we throw into a hole today will become tomorrow’s mess. So, let’s make keepsakes out of our refuse. Hence, this year’s material of choice, aluminum soda cans!
So I had the material (and trust me, that was a long process, deciding), next I had to decide what to do with the shiny, thin metal. What have I been most excited by? My brother, Evan, has recently gotten engaged to his fiance, Brianna. The thought of my family structure changing (for the first time ever) is definitely memorable. I’m happy for Evan, and this is a great way to remember it; A heart.
And then finally, every good thing should be topped off with CANDY. Come on, I know you agree!
The Process:
It took a while to refine the process for making this year’s ornaments. After all, I was using a material I’d never used, and I was designing the process as I went. The first step was to decide just how to give the ornament its ‘wow-factor’ – something unique about it. I decided that I would make the flat aluminum become 3-dimensional, and I’d do it by pressing the metal into a die or mold.
First, I started with creating my die out of steel… And then I realized I couldn’t cut it with my scroll saw without killing my blades!

So after I made that fancy steel design, I just gave up and switched to using an acrylic die. Here it is:

At this point, I was ready to start producing!
1. Cut the usable aluminum from the can. First, score the can with a razor (embedded in mathematics!).

2. Carefully peel/tear the usable part of the can from the rest.

3. Flatten the aluminum! This was a fun part of the building process to figure out how to do. I just searched around my apartment for all kinds of different diameters of cylinders. Started with my salt shaker, then used my 1″ PVC pipe, then something else, and finally, found an ancient thermometer case with the perfect size. Basically, I had to roll the thin aluminum the opposite way that it was already shaped in. This makes it flat.


4. Cut the aluminum to the right size (with a standard pair of scissors) and then duct-tape it to the die.

5. Press the design into the aluminum. I spent some time playing around with different sizes and shapes of tools to press the aluminum before I decided to sacrifice a C-clamp and remove the steel rod that gives you the ability to tighten it down. : )

Almost done (this pressing part took a bit over 20 minutes):

6. Fold the pressed aluminum (to match up as perfectly as possible). I eventually realized that I could cut a line into the die to act as the start for my perfect fold.
7. Epoxy both sides together (and let it set for maybe 10 minutes).

8. Cut the aluminum to the heart shape (with scissors).

9. Paint it! I tried paint pens, but ended up becoming an artist and used acrylic paints. 2 coats of white, red stripes, and finally, the year and my signature snowflakes.

10. Drill the hole for attaching the hanger.

11. (Final Step!) Twist the hanger wire into place!

Total Production time per ornament: About 1.5 hours!
The Final Finished Product:

Okay! You’ve now seen the entire process that it takes to make just one of the ornaments that I made this year. I hope you enjoyed all the photos! I know that the whole scheme of this year’s post was a bit exhaustive.. I want you all to know that you mean just this much to me!
With much love,
Doug
Almost time to start Raisin’ Hope in Philly!
It’s almost here! This sunday marks the 3rd Raisin Hope in Philadelphia charity ride! Definitely the event of the season!
I’ve received questions about what the route will be like, where we meet up, and how many riders are expected.
Time: 9:45am (ride leaves at 10:00am)
Location: Intersection of Lemon Hill Drive and Sedgely Drive in Fairmount Park.
If you are driving down Kelly Drive from the West of the city, turn left at the first light (Poplar Rd) you see after the boathouses are on your right side. Parking is available on the street (safe area) and we will be meeting under the tree right at the intersection (on grass). Message me if you think you’ll have difficulty finding this.
To answer the routes question:
35 Mile Route:

Last time we ran this 35-mile route, which turns around in Fort Washington State Park, we had a lot of fun. Because it starts in central Philadelphia, there will be some hills on the way out of the city. But, I personally ride a good amount of this route every time I ride my road bike, and it definitely doesn’t kill me. If you’d like to get some real hill-riding in, well, you should probably live in Manayunk. This will have 1 definite rest stop, with the possibility of a second one in the first 12 miles.
71-mile route:

The 63-mile route is a small part of a local ride called the Carversville Century. This route really gives you an opportunity to see a good span of scenery, from central Philadelphia, to the inner suburbs, to well, more outer ones too! Turning back towards the city after a nice, relaxing stop at Steever Manor Professional Center in North Wales for a rest stop, this route will make you feel like a solid cyclist who knows what he/she’s riding for. At best, and over this distance, I’d call this a “rolling” terrain.
This ride will be supported with a SAG vehicle, rest stops, and smiles. Bring everyone you can! You’re getting a chance to meet and ride with a former professional bike racer, but more importantly, a chance to help a great cause!
I suggest a $12 donation to the Raisin Hope Foundation- but more is always encouraged.
-Doug
Raisin Hope in Philly Ride: Update
[Updated 5/20/11] :
I previously wrote that the event was cancelled- and that confused a lot of people. The ride is absolutely not cancelled. As a matter of fact, I’m finding that there :will: be plenty of people coming and riding to help support the Raisin Hope Foundation! The extent that I can plan and arrange volunteers to run rest stops is, however, still questionable. Please email me (dougtrails2011 @ gmail . com) or comment on this post to tell me that you can volunteer to run a rest stop or two!
Why have I been busy and not planning the Raisin Hope in Philadelphia 2011 ride? You may have been alerted that in the summer of 2011 (beginning June 27 in San Francisco) I will be riding my bicycle across the continental United States and raising awareness and inspiration for those who have sustained traumatic brain injuries. I will be speaking and visiting rehabilitation hospitals, support groups, and individuals who are in recovery from this devastating condition, hoping to show them that the can recover and return to everyday life… It won’t be easy. That goes for both recovery and riding 3000+ miles on a touring bicycle. Part of the money I raise from fundraising for the journey and while I’m on the road will be given to the Raisin Hope Foundation. By no means am I forgetting a big part of my mission! Visit the tour’s website for the complete story and to see video.
The ride slated to take place on May 29, 2011 (Sunday of Memorial Day weekend) will not be as well planned or supported as I’d have preferred. BUT, I’m still riding as much as 60 miles that day, and invite you to join me. If you would like to still donate to the Raisin Hope Foundation, please come and do so! I am aware that many of you have plans for the weekend, and urge you to do what you think is best and follows your interests most. If you plan to come, send an email to dougtrails.wordpress.com and let me know so that I can be prepared to see you on May 29.
Doug Markgraf
Raisin Hope in Philadelphia Ride 2011!
The third annual Raisin Hope in Philly ride is coming up! This year, we are working toward a bigger, better, and more awesome ride, all to help people recovering from Traumatic Brain Injury in support of the Raisin Hope Foundation.
Background information:
On May 31, 2006, Doug Markgraf was involved in a hit-and-run accident while riding his bicycle in West Philadelphia, leaving him unconscious and in critical condition. His bicycle helmet saved his life, leaving him in a comatose state for 2 weeks with shattered bones and a very uncertain future. In rehabilitation and recovery for the better part of a year, his relentlessly positive spirit allowed a return to regular life and society. But, his life was forever changed. He strives to give others who have experienced this life-shattering condition a second chance- through educating the greater public and inspiring others recovering to accept nothing less than their absolute best dreams and goals. By riding with Doug and donating to the Raisin Hope Foundation, you can become part of this life-changing mission.
Specifics:
This year’s ride will begin at the corner of Sedgley Dr and Lemon Hill drive in Fairmount Park, an excellent location for both riding -and parking. Prepare for a fun jaunt through Fairmount Park (as always!) and then an abrupt (and fun) exit into Montgomery and Bucks Counties, allowing inner-city cyclists some fresh air, while giving everyone an opportunity to see excellent Spring scenery. This Event will occur RAIN or SHINE.
Date: Sunday, May 29th, 2011 This is the official date!
Meet-up time: 9:45am
First pedal stroke: 10:00am
Required: Helmet, bicycle, SMILE!
Recommended: $12 donation (Cash or Check) to the Raisin Hope Foundation
Route options:
15 miles (stays within Fairmount Park, 1 rest stop)
35 miles (heads to Fort Washington State Park, 2 rest stops)
50 miles (turn-round location not decided yet, 3 rest stops)
100 miles (For the crazy TBI survivors and racers, 3 rest stops + Wawa extraordinaire)
Sponsors/media/questions can be directed to dougtrails2011 (at) gmail (dot) com. We’re also looking for volunteers! Act now, sign up today!
WE HOPE TO SEE YOU THIS YEAR!
2010 Christmas Ornament!
Merry Christmas and Happy Holidays, everybody!
I hope everyone’s holiday season goes amazing, that you’re surrounded by your loved ones, and that you are blessed with much to look forward to!
This year’s Christmas ornament is a large step from last year’s acrylic sheet ornament (Link: https://dougtales.wordpress.com/2009/12/27/post-christmas-update/)! I really hope that everyone likes the progression that I’ve made with this tradition, and I urge you to comment or suggest for next year!


I’m going to go into a lot more detail about this one than I did about the last. There are many things that go along with this ornament that make it very special to me and hopefully you as well.
The selection/design process:
You have to start somewhere, right? Well, this year’s ornament started with the simple idea that I would stick with my new favorite aesthetic building material, acrylic plastic. I love wood, and I love metal, and heck, I love carbon fiber too. But, for my humble startings I like acrylic because it has a good return on the investment- it’s flat, small to transport on my bike, light, and cleans up exceptionally well. It starts out like this:

Interestingly, I couldn't find a stock image of the exact stuff I use- it doesn't come with paper on it, but a really crappy plastic film that takes forever to remove.
So I had leftover acrylic from last year, a decent amount. Why not finish it all up, right? So I did, really. Okay, so now I had my basic idea for the material. What should I make? The question really relies on thinking: What do I think I ought to remember about this Christmas season? Truthfully, the only thing I could say that was really outrageously memorable was how my family is changing significantly. So, I should mark the change, right?
Planes. I thought it’d be fun to make a plane because it is actually a structure that can be simplified a good bit while still being very easy to recognize. We all liked planes at some point. One person in my life who always had a love of planes was my Grandpop, my mom’s father. Some of the earliest memories I have of him were when he would show me the model planes he had built that filled his basement workshop. They all looked professionally-built, and it was always special to go down there. He built planes that he would fly with remote controls in large fields pretty close to their house. For the past few years, his health had been declining, and I knew it would be time to remember some things about him. 2 weeks ago, my Grandpop died in the early morning at the nearby hospital, and the family is coping with this loss right now.
One other reason planes are perfect: My parents hopped a jet-plane out of the continental US recently as well. For the next year (and likely more), they will be living, working, and enjoying life on St. Croix, in the Virgin Islands. Quite a life turned upside down, from having lived in the Northeast for their entire lives, right? Peace and tranquility might not be words that even barely describe this new way of life. So yeah, planes represent change to a new location.
I decided to look up diagrams/schematics of planes so that I could make this ornament as realistic-looking as possible. I spent maybe a day trying to find a good image online and elsewhere. I even have a coloring book sitting around my apartment called ‘Things that go!’ and checked in it to see about a great outline of a plane that I could use. Nope, they all looked way too cartoony. So I looked up real fighter planes instead. Of course, right? I ended up finding a great-looking plane with an excellent image, the Macchi C.202 ‘Folgore’ plane, an italian plane that was used during WWII. Here’s a link to the wikipedia page about it: http://en.wikipedia.org/wiki/Macchi_C.202 . Italians know how to make a hot-looking plane. They made a crapload of these for the war, a startling 1200 of them. Can you imagine if they flew all 1200 of them in a formation above Philadelphia? That would be scary. We wouldn’t need to worry though, apparently their machine guns (mounted on each side) had a problem with firing at the right times. Oops.
Okay, so there’s the plane. I found a great diagram of it, and started to make my layout for the acrylic pieces. I printed this, copied it, and kept scaling up/down until it was a size that I thought would be perfect. Finally got the size right after maybe 5 tries. Oh btw, I love my printer so much more after this project! After the scaling, I still had more that I had to add to it- I needed to adorn the wings and fuselage with logos or emblems! Otherwise, it wouldn’t be my own, and more importantly, it wouldn’t be holiday-related. It’d just be Doug making fighter planes… (Not a bad idea though!) So I experimented with different fonts for the year that I’d put on the fuselage, and also with my signature snowflake image that I used last year. More scaling with the printer helped me fit these perfectly. So then when I had the right sizes, I printed the diagram of the plane out, used a marker to make the outline more pronounced, and used packing tape to place the emblems on the wings and the fuselage. [I ended up just writing the year onto a later version to fit the shape a little better. And then I didn’t have to play around with mirroring the image with my printer!]

Next step: making it so that I’d know where and how to cut on the bandsaw. So yeah, I just had to tape the diagram to one side of the acrylic sheet (after I removed all of that darn film they had on them).

The building stage:
So now I had it all laid out. Well, for the most part. The next challenge: cutting the dang stuff! It was difficult for many reasons. Firstly, the stuff really loves to melt right after the blade cuts it. So for the first like 4 ornaments that I cut out, I was quickly cutting, and as soon as the blade was through it, using a pair of pliers to shatter the acrylic along the lines that the blade had cut at and the plastic had begun to solidify again. This left me cursing on occasions when it shattered wrong. Solution: SLOW the blade down. How much? All the way. Like geez, I’d have never guessed this. So to conclude, the stuff shatters and melts. Joy! Oh and the other main challenge: I broke blades like you wouldn’t believe. For a few of the ornaments, I used up 2 or 3 blades. I started my project with maybe 15 blades and ended up having to purchase 12 more after I broke em all. I’ve only got one left, and that’s on the machine right now. Oops.
I cut on the lines, and each part takes between 5 and 15 minutes to cut out. This may or may not include re-taping parts of the layout that had begun to fall off because I cut it, too. Anyways, the next step I took was to etch the year and snowflakes. So I used my trusty Dremel tool with the smallest round-tip etching bit I had, and once again, just etched on the lines. Kinda like just rewriting or tracing over what was already there. Piece of cake. [I eventually changed the order of operations to do the etching first, so that I didn’t have to put special effort into making sure the material didn’t move while I etched. ]
Etching: 
Cutting and breaking a blade: 
Cutting: 
After the parts were all cut, I had to do my finishing of the parts. So, I spent time with my dremel tool with a sanding bit, shaping the edges until they were ‘just right’. Final touch: beveling the edges of each part at a 45-degree angle with my tool. That part was so relaxing. I don’t have a photo of it though.
The next part was fun and simple: coloring in the etching. This was something I added because I felt like a clear piece of plastic is just that. Boring and plain. It might be shaped cool, but it doesn’t look ideal. So my students I teach actually helped me with the idea for this one: they enjoy using pens and marker to color up the letters of my [custom] bathroom pass! So, I did the same here. I used just some markers to draw in the etched plastic. The ink stayed in, not on. Color! Green, red, and blue!
Last steps of this process: gluing the parts into the final form, and bending/making the hanger hook. Fitting the parts into the slots often meant making tiny cuts here and there.
Gluing: 
No photos of the hanger making, that was just me wrapping wire with pliers.

Alot of thanks goes out to my brother, Zach, for working until 4am the other night, cranking out ornaments with me. I never thought I’d have an ornament ‘team’, but we might! I’ll work on turning as many people as possible over to the ‘crafty’ side. 🙂
Cool photos of the process that need no explanation:


Last thing: I mailed ornaments in bubble mailer envelopes. I have no idea what condition they arrive in. If your ornament arrived in bad condition, LET ME KNOW and we’ll work something out.
Alright, that’s it! I hope you enjoy your ornament and you enjoyed this documentation of the process and explanation! If you would like to request one for purchase, repair, or anything you wanna say, send me a message (above) or a comment (below). : )
Merry Christmas!
-Doug
A Summer Reminder: Wear a helmet!
Hey everybody,

No, this isn’t me… And I’m not entirely sure that this wasn’t photoshopped or anything. But regardless, I’d hope that none of you ever have to get a head x-ray, cat scan, MRI, whatever. Lately I’ve had numerous students ask me about my trach scar, and I happily explain to them my story. Hopefully they’ll wear their helmets when they ride their bikes like I do!
I’ve noticed a bunch of people who think that they’re wearing bike helmets while riding lately. What do I mean? If you wear a helmet incorrectly, you might as well not wear it at all. This means: ALWAYS TIGHTEN AND FASTEN THE STRAP ON YOUR HELMET. – ALWAYS MAKE SURE YOUR HELMET IS SNUG ON YOUR FOREHEAD.
Send me a message and I’ll tell you how I cracked my recently-purchased, $70 commuter bike helmet. Don’t worry, I didn’t hurt myself even one little bit… There’s certainly a funny story to go along with it though! I could have kept wearing it, but no… If you see any cracks in the styrofoam, that’s when you need to replace your helmet! Even if you’re just riding for a 5-minute period, you should still wear a helmet! Cars are much more massive than bicyclists – use the laws of physics to justify a new helmet purchase, friends!
Alright, thanks for reading my public service announcement. Next week, we’ll tell you how to effectively (and safely!) skin a tiger!
Have a safe day,
Doug

Recent Comments